
Terminology update: The current Field App may still use the word Deal in some places. This will be renamed Project. Both terms currently refer to the same workspace.
Create a project
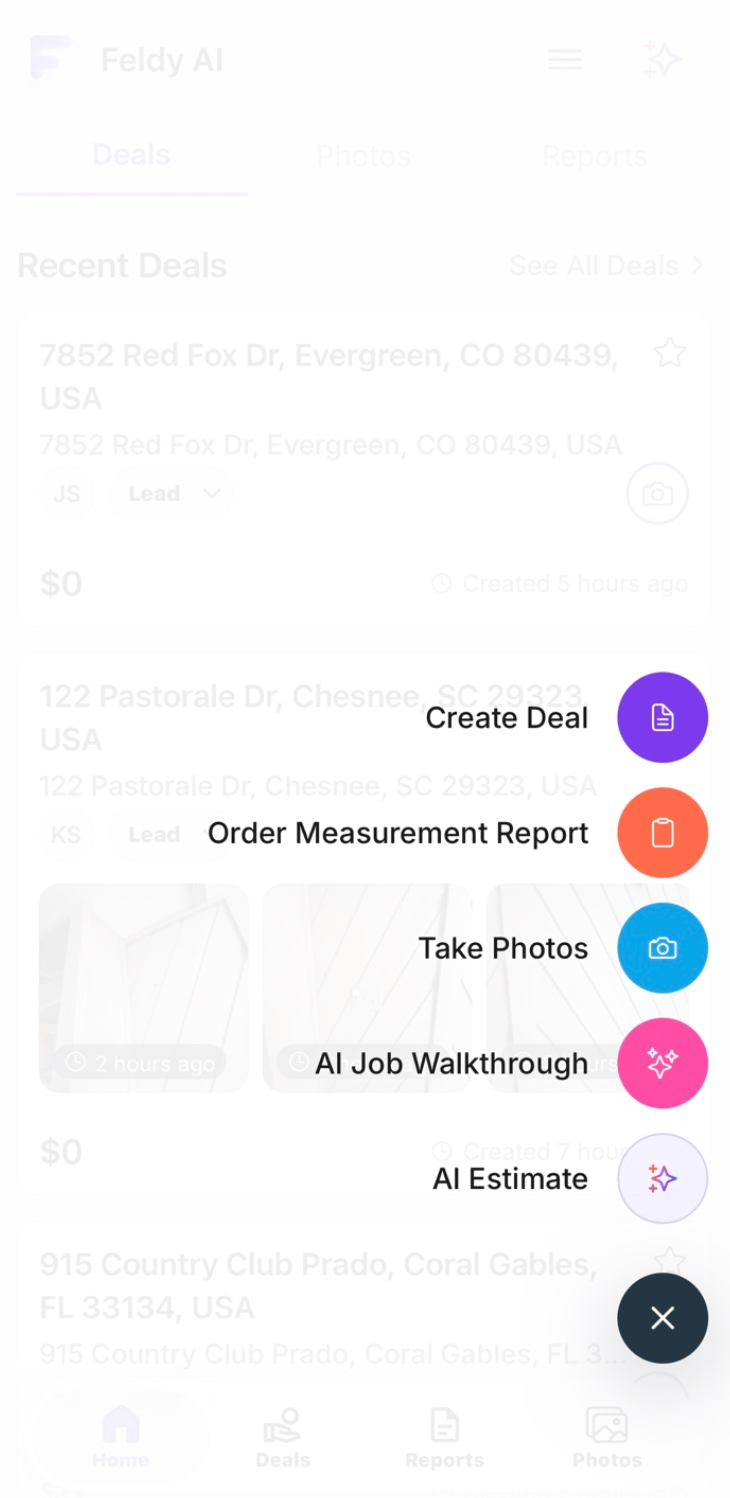
To create a project from the Field App:- Open the Feldy home screen.
- Select the purple plus button in the lower-right corner.
- Select Create Deal or Create Project from the actions menu.
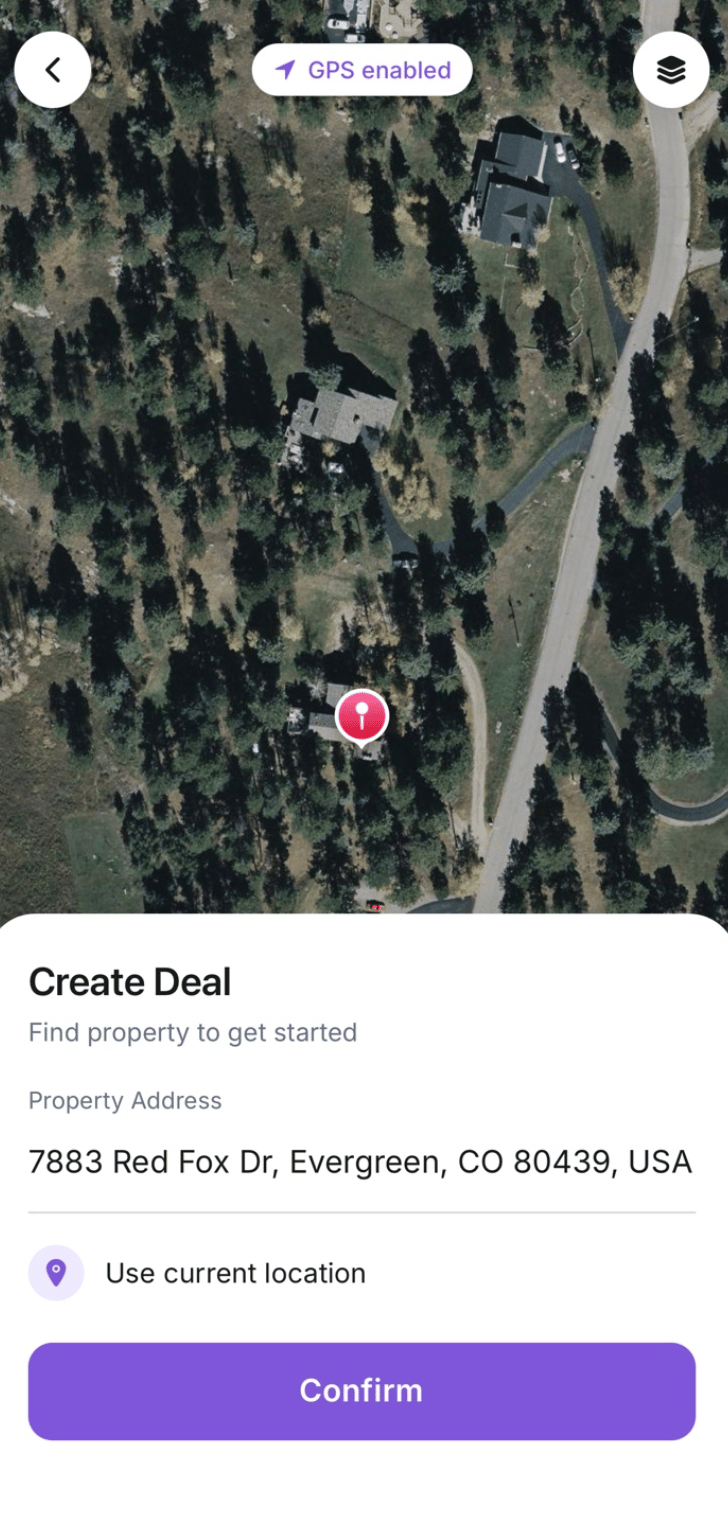
- Find and confirm the property.
- Choose the project type.
- Enable the relevant trade features.
- Add optional customer and project information.
- Select Create project.
Open the actions menu
The purple plus button appears in the lower-right corner of the Field App. Selecting it opens common actions such as:- Create a project
- Order a measurement report
- Take photos
- Start an AI Job Walkthrough
- Create an AI estimate
Find the property
Feldy opens a map to help identify the project location. You can:- Search for the property address
- Use the device’s current location
- Move the map to adjust the property pin
- Change the map layer when needed
- Properties with long driveways
- Multiple buildings
- Rural properties
- Apartment complexes
- New construction
- Commercial sites
- Addresses shared by multiple structures
Confirm the project details
After selecting the property, review the project information. The creation form can include:- Property address
- Project type
- Enabled trade features
- Customer information
- Project information
Project type
Choose:- Residential
- Commercial
Enable features
Choose the trade or service features that should be available for the project. For example:- Roofing
- Exteriors
- Interior work
- General field services
Add customer information
Customer information is optional during initial project creation. You may add details such as:- Customer name
- Email address
- Phone number
- Company
- Billing information
Add project information
Project information is also optional. Depending on the organization, this can include:- Project name
- Project stage
- Project owner
- Estimated value
- Internal notes
- Service type
- Assigned team members
Create the project
After reviewing the property and selected features, select Create project. The project is added to the organization and becomes available to other authorized users. It can then be opened from:- Recent Projects
- All Projects
- Search
- The Feldy web platform
Quick actions after creating a project
After project creation, Feldy may display optional quick actions that help prepare the job. These actions can be completed immediately or skipped and used later from inside the project. Different organizations may see different project-creation options based on their trade or property-service vertical. For example, a roofing organization may see roof measurements and report actions, while a flooring organization may see flooring-specific service details such as the ability to do interior 3D scans. Feldy only displays the fields, features, and quick actions that are relevant to your organization and enabled by your administrator.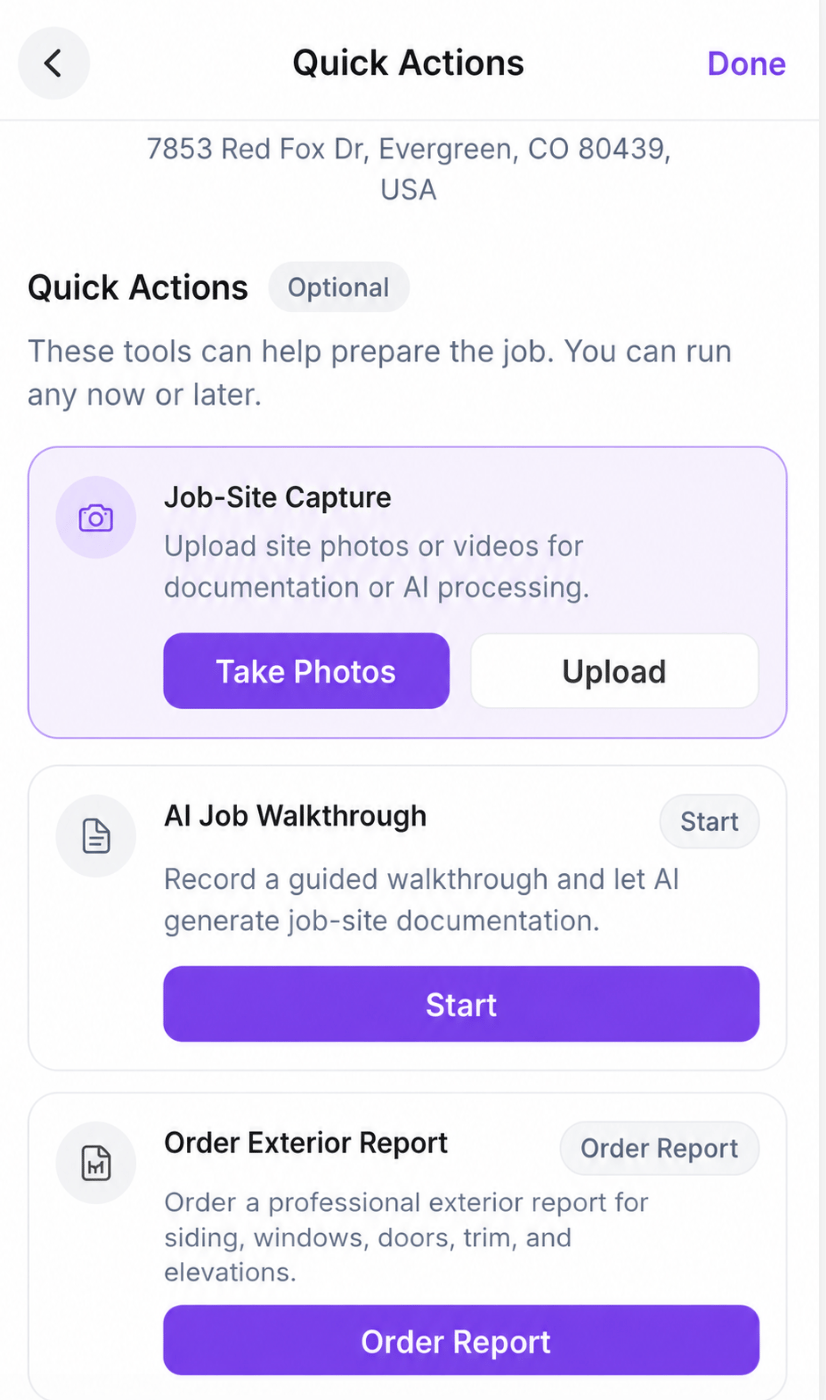
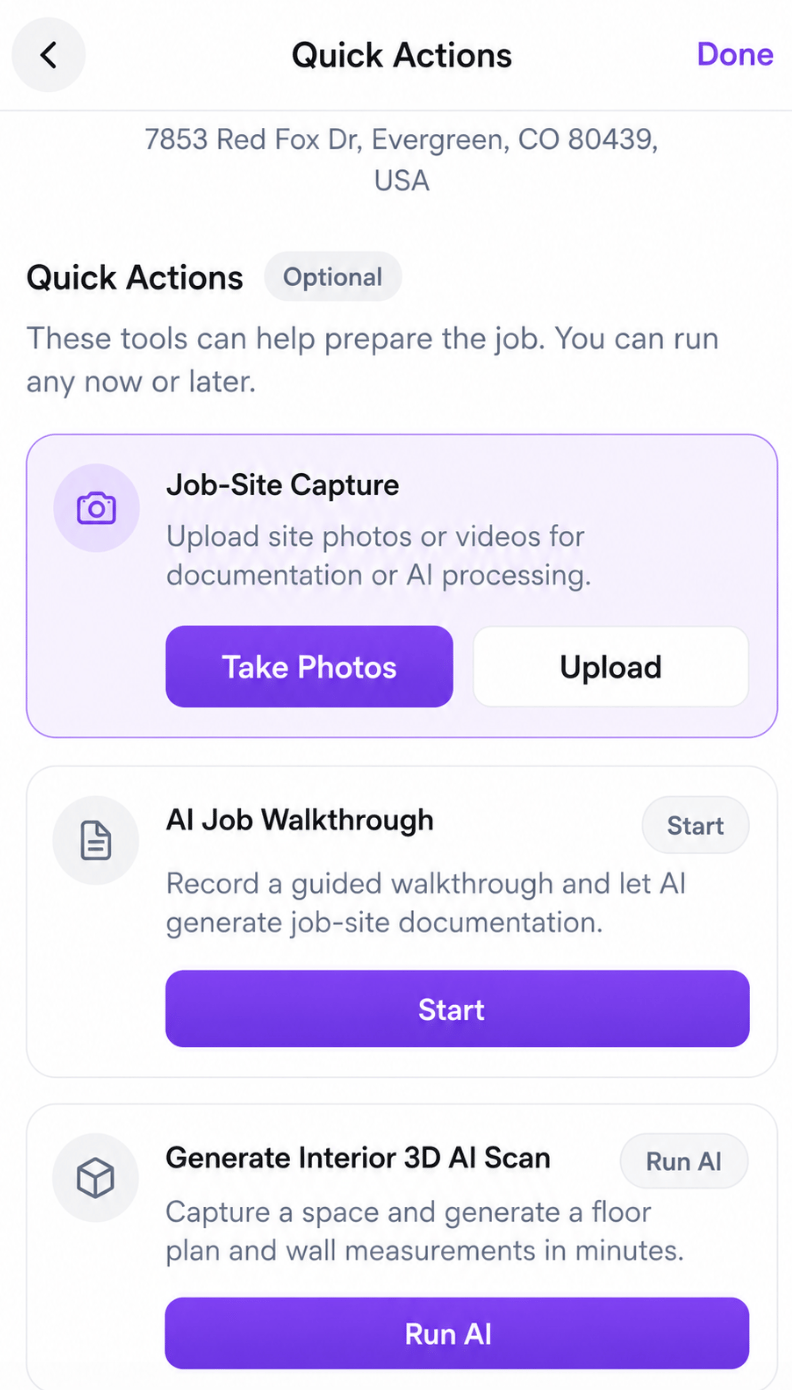
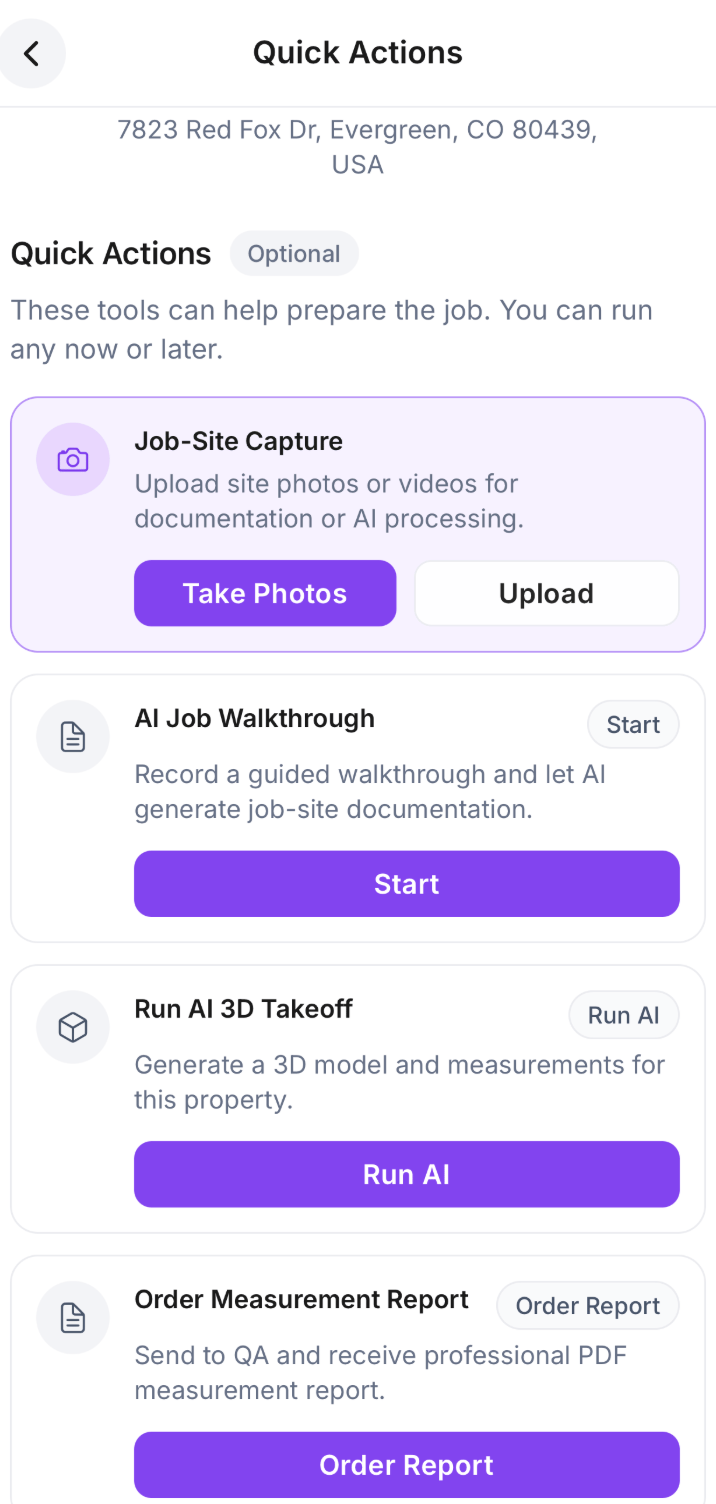
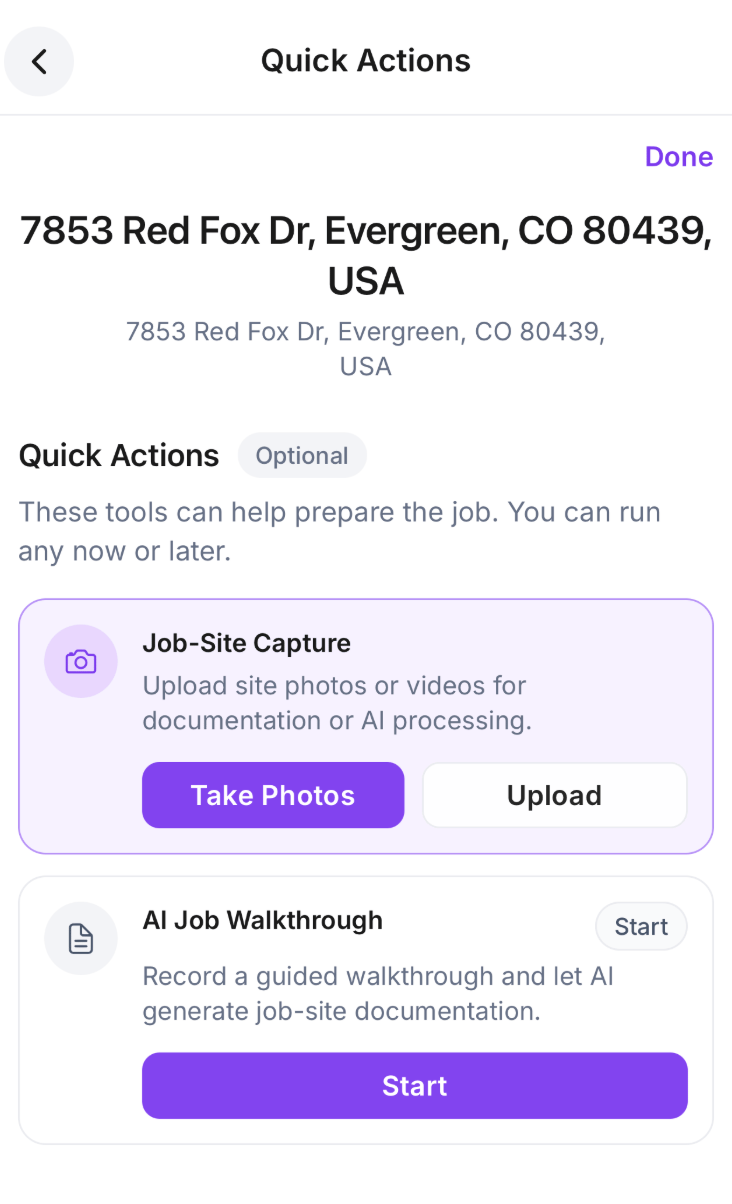
Jobsite Capture
Use Jobsite Capture to add photos or other supported media. You can:- Take new photos
- Upload existing photos
- Capture exterior conditions
- Document rooms
- Record damage
- Capture product labels
- Document access conditions
- Add supporting media for AI processing
AI Job Walkthrough
Use AI Job Walkthrough to record a guided jobsite walkthrough. As you move through the property, describe:- Existing conditions
- Customer requests
- Work that needs to be completed
- Damage or defects
- Installation requirements
- Areas requiring follow-up
Trade-specific quick actions
Organizations may receive additional actions based on their trade. The user only sees features that are enabled for the organization or project.Roofing projects
Roofing organizations can receive specialized tools for roof measurement and estimating. Available actions may include:Instant AI 3D Takeoff
The user can generate an initial AI roof model and preliminary roof measurements. This can provide:- Roof area
- Roof-facet count
- Pitch information
- Edge measurements
- A 3D roof visualization
- Preliminary measurement data
Order a Roof Measurement Report
The user can submit the property for a Certified Roof Measurement Report. When ordering from inside a project, Feldy can use:- The project address
- Customer information
- Existing project photos
- Additional field notes
- The selected structures
- The project’s report recipients
Roofing feature availability
When roofing is not enabled, Feldy may display a message explaining that roofing features are available. An authorized user can select Enable Roofing or contact the organization administrator to request access. Once enabled, roofing actions become available in the project.Exterior projects
Exterior-focused organizations may have access to an Exterior Report workflow. Exterior reports can support work involving:- Siding
- Windows
- Doors
- Trim
- Fascia
- Soffits
- Gutters
- Exterior painting
- Other building-envelope products
Interior projects
Interior-trade organizations may have access to Interior Scan. The user moves through the interior with a supported device while Feldy captures room geometry. The generated result can include:- A floor plan
- Floor dimensions
- Floor area
- Wall lengths
- Wall measurements
- Room boundaries
- Doors
- Windows
- Openings
- Flooring
- Painting
- Drywall
- Wall finishes
- Restoration
- Remodeling
General project actions
All organizations can have access to common project tools regardless of trade. These can include:- Take photos
- Upload photos
- AI Job Walkthrough
- Create an estimate
- Add documents
- Add comments
- Add customer information
- Assign a project owner
- Update the project stage
- Review project activity
Open a project
After creating a project, Feldy opens the project workspace. The project header can display:- Project address
- Customer
- Project owner
- Project stage
- Project value
- Favorite status
- Camera access
- Project
- Estimates
- Photos
- Documents
- Measurements
- Reports
- Files
Project quick actions
The Project section can display shortcuts such as:- Create Estimate
- AI Job Walkthrough
- Order Measurement
- AI Measurement
Projects with no photos
A newly created project may initially display No photos yet. Select Add photos or the camera button to:- Take new photos
- Upload existing photos
- Start jobsite documentation
- Prepare inputs for AI processing
- Add images before ordering a measurement report
Mobile and web synchronization
Projects are synchronized between the Field App and Feldy web platform. When a user creates a project on mobile, it appears on the web. When an office user creates a project on the web, it appears in the Field App. Synchronized project information can include:- Project address
- Customer information
- Project owner
- Project stage
- Project value
- Photos
- Documents
- Measurements
- Reports
- Estimates
- Comments
- Files
Example workflow
A typical mobile-to-office workflow might be:- A field representative creates the project from the property.
- The representative takes exterior photos.
- The representative starts an AI Job Walkthrough.
- A roofing measurement is ordered.
- The office team opens the project on the web.
- The estimator reviews the photos and measurements.
- The estimate is prepared.
- The project manager continues using the same project after the work is sold.
Feature availability
The actions displayed inside a project depend on:- Organization type
- Enabled products
- Selected trade
- Project type
- User permissions
- Device capabilities
An organization administrator may need to enable certain features before users can access them.
Best practices
When creating a project:- Confirm the correct property pin.
- Choose the correct residential or commercial type.
- Enable only the relevant trade features.
- Add the customer when the information is available.
- Use a recognizable project name.
- Take jobsite photos early.
- Capture all important work areas.
- Add notes for unusual property conditions.
- Confirm that the project appears on the web before leaving the site when the connection is unreliable.
- Allow uploads to finish before closing the app.
- Refresh the project if newly added information does not appear immediately.
- Confirm that photos are attached to the correct project.
- Avoid creating duplicate projects for the same job.
- Use one shared project for the complete customer and job history.