> ## Documentation Index
> Fetch the complete documentation index at: https://docs.feldy.ai/llms.txt
> Use this file to discover all available pages before exploring further.
# videos
Videos let field teams capture continuous visual context from a jobsite and save it directly to a Feldy project.
Use video when a single photo does not provide enough context, such as when documenting an entire room, walking around an exterior, showing the extent of damage, recording installation progress, or explaining how multiple areas connect.
Videos are stored alongside project photos so the office and field teams can review all visual documentation in one place.
> **Limited availability:** Video capture is currently available to selected organizations. Contact [**support@feldy.ai**](mailto:support@feldy.ai) to request access. Your organization may be added to the waitlist before the feature is enabled.
> **Recording limit:** Each individual video can be up to **10 minutes** long.
Photos tab will be renamed "Capture" on August 15th, 2026.
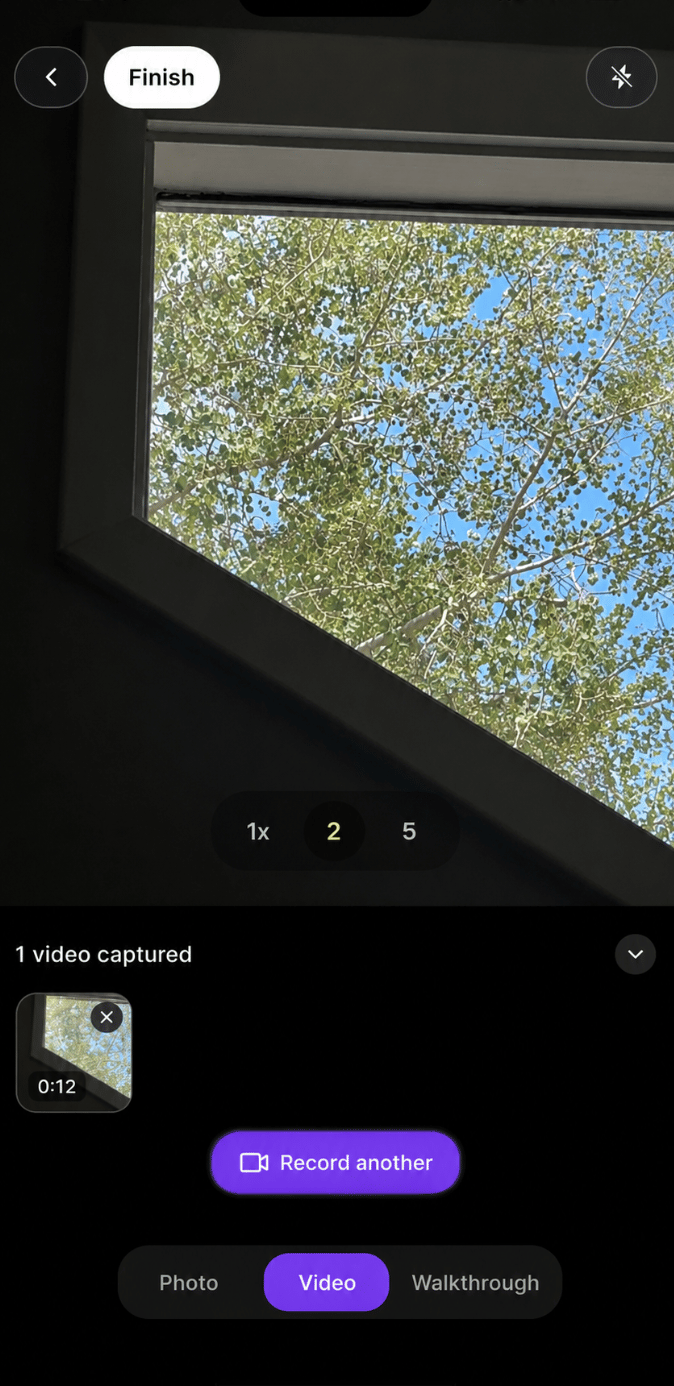
 ## Start recording a video
You can open Feldy’s capture experience from camera buttons located throughout the app.
To record a video:
1. Open the project where the video should be saved.
2. Select a **camera** button.
3. Choose **Video** from the capture options at the bottom of the screen.
4. Select the record button.
5. Move through the jobsite while recording.
6. Select the stop button when the recording is complete.
The video remains connected to the selected project.
## Switch between capture modes
The Feldy camera includes three capture modes:
* **Photo**
* **Video**
* **Walkthrough**
Select **Video** before recording.
Changing modes does not remove photos or videos already captured during the session.
## Record multiple videos
You can record more than one video before leaving the capture screen.
After completing a recording:
1. Review the video thumbnail in the capture tray.
2. Select **Record another**.
3. Record the next area.
4. Repeat as needed.
5. Select **Finish** when all videos have been captured.
Each recording is saved as a separate video.
This is useful when different areas should remain clearly separated, such as:
* Kitchen
* Primary bathroom
* Roof damage
* North elevation
* Basement
* Completed installation
* Customer concern
* Final inspection
Recording separate videos also makes it easier for office users to find the relevant area without reviewing one long recording.
## Review captured videos
Videos captured during the current session appear in a tray above the capture controls.
Each video thumbnail can display:
* A preview image
* A play indicator
* The video duration
* The order in which it was captured
The tray only displays videos while **Video** mode is selected.
Select a thumbnail to review the video before finishing the session.
## Finish the capture session
When you have finished recording:
1. Confirm that the expected videos appear in the tray.
2. Select **Finish**.
3. Allow Feldy to upload the recordings.
4. Keep the app open when possible until the upload is complete.
Upload time depends on:
* Video length
* Number of videos
* Connection speed
* Device performance
Videos may take longer to upload than photos.
### Record multiple videos in one capture session
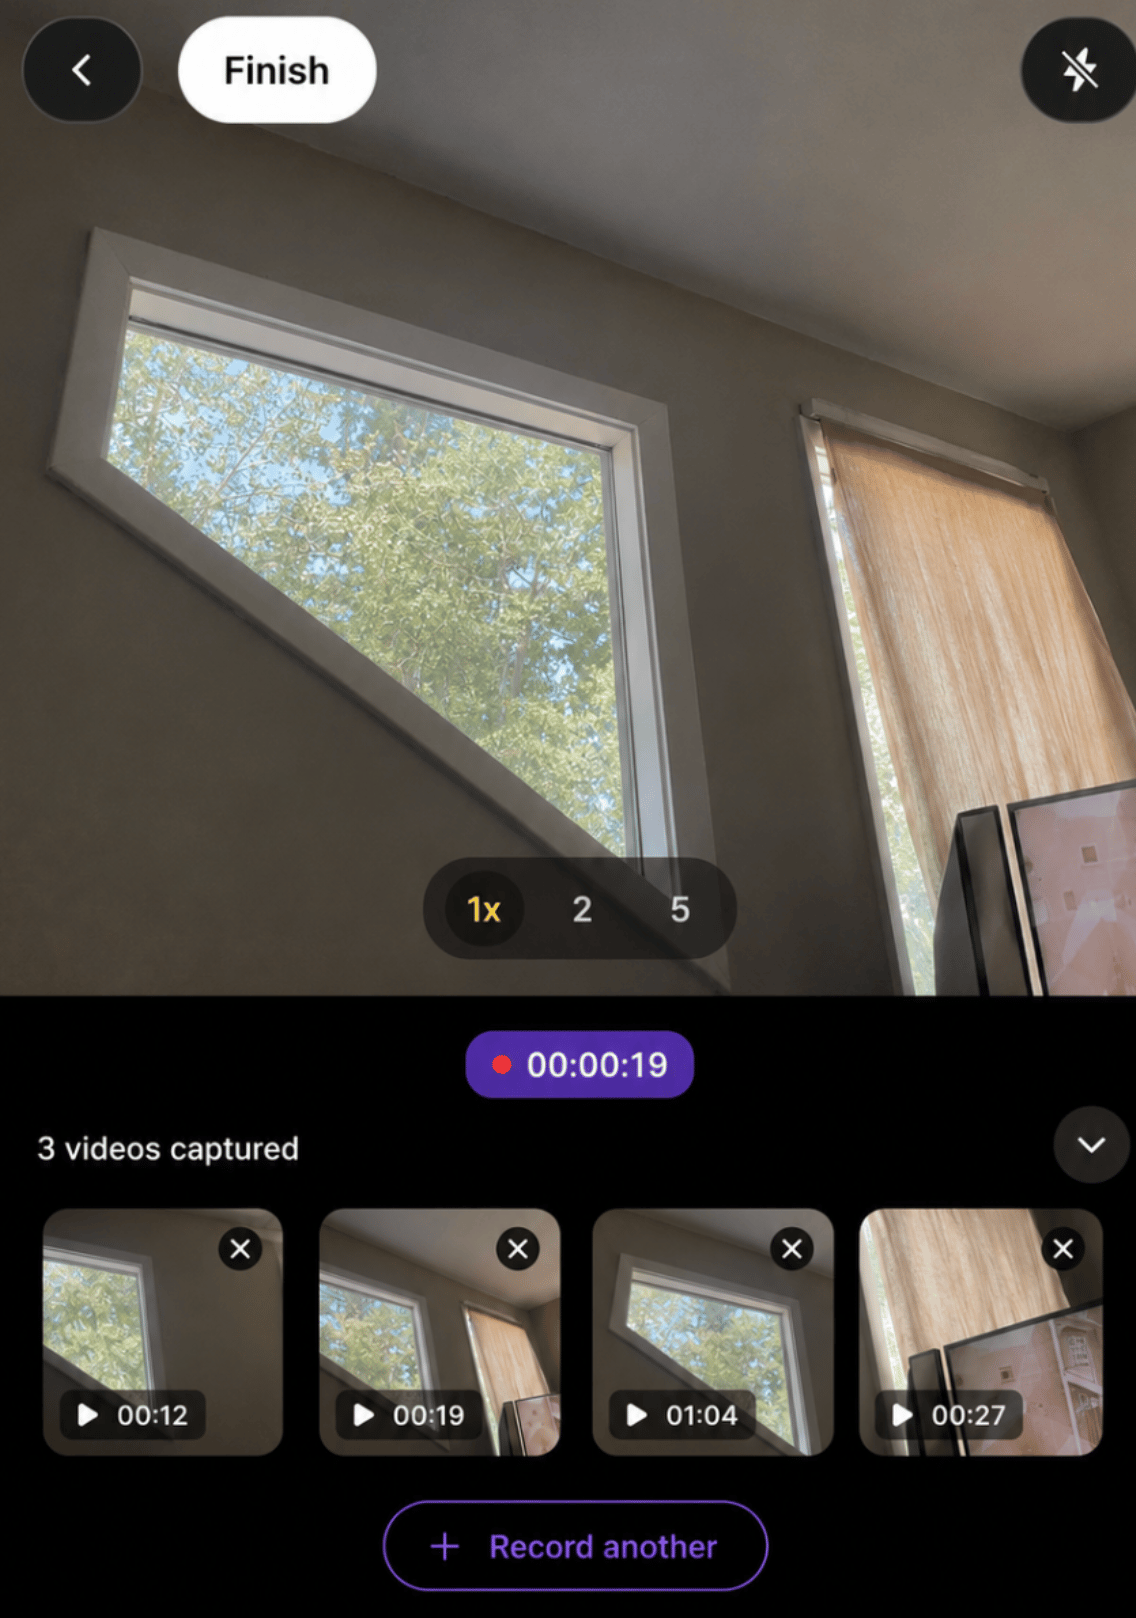
Feldy supports recording **multiple videos within a single capture session**. After recording one clip, the user can tap **Record another** to continue capturing more videos without leaving the camera flow.
Each recording is saved as a **separate video file** rather than being combined into one long video. This makes it easier to capture different rooms, conditions, or work areas in a structured way and review each video independently later.
**How it works**
* Start a video capture session.
* Record a clip.
* Tap **Record another** to capture the next clip.
* Repeat as needed within the same session.
* When finished, each clip is saved as its **own individual video**.
**Why this is useful**
* Separate videos by room, elevation, or work area
* Capture before/after conditions in distinct clips
* Keep videos easier to review, share, and reference
* Avoid creating one long video that is harder to navigate
**Result**
## Start recording a video
You can open Feldy’s capture experience from camera buttons located throughout the app.
To record a video:
1. Open the project where the video should be saved.
2. Select a **camera** button.
3. Choose **Video** from the capture options at the bottom of the screen.
4. Select the record button.
5. Move through the jobsite while recording.
6. Select the stop button when the recording is complete.
The video remains connected to the selected project.
## Switch between capture modes
The Feldy camera includes three capture modes:
* **Photo**
* **Video**
* **Walkthrough**
Select **Video** before recording.
Changing modes does not remove photos or videos already captured during the session.
## Record multiple videos
You can record more than one video before leaving the capture screen.
After completing a recording:
1. Review the video thumbnail in the capture tray.
2. Select **Record another**.
3. Record the next area.
4. Repeat as needed.
5. Select **Finish** when all videos have been captured.
Each recording is saved as a separate video.
This is useful when different areas should remain clearly separated, such as:
* Kitchen
* Primary bathroom
* Roof damage
* North elevation
* Basement
* Completed installation
* Customer concern
* Final inspection
Recording separate videos also makes it easier for office users to find the relevant area without reviewing one long recording.
## Review captured videos
Videos captured during the current session appear in a tray above the capture controls.
Each video thumbnail can display:
* A preview image
* A play indicator
* The video duration
* The order in which it was captured
The tray only displays videos while **Video** mode is selected.
Select a thumbnail to review the video before finishing the session.
## Finish the capture session
When you have finished recording:
1. Confirm that the expected videos appear in the tray.
2. Select **Finish**.
3. Allow Feldy to upload the recordings.
4. Keep the app open when possible until the upload is complete.
Upload time depends on:
* Video length
* Number of videos
* Connection speed
* Device performance
Videos may take longer to upload than photos.
### Record multiple videos in one capture session
Feldy supports recording **multiple videos within a single capture session**. After recording one clip, the user can tap **Record another** to continue capturing more videos without leaving the camera flow.
Each recording is saved as a **separate video file** rather than being combined into one long video. This makes it easier to capture different rooms, conditions, or work areas in a structured way and review each video independently later.
**How it works**
* Start a video capture session.
* Record a clip.
* Tap **Record another** to capture the next clip.
* Repeat as needed within the same session.
* When finished, each clip is saved as its **own individual video**.
**Why this is useful**
* Separate videos by room, elevation, or work area
* Capture before/after conditions in distinct clips
* Keep videos easier to review, share, and reference
* Avoid creating one long video that is harder to navigate
**Result**
A single capture session can produce **multiple different videos**, each stored individually for later use in the project.
 ## Find videos in a project
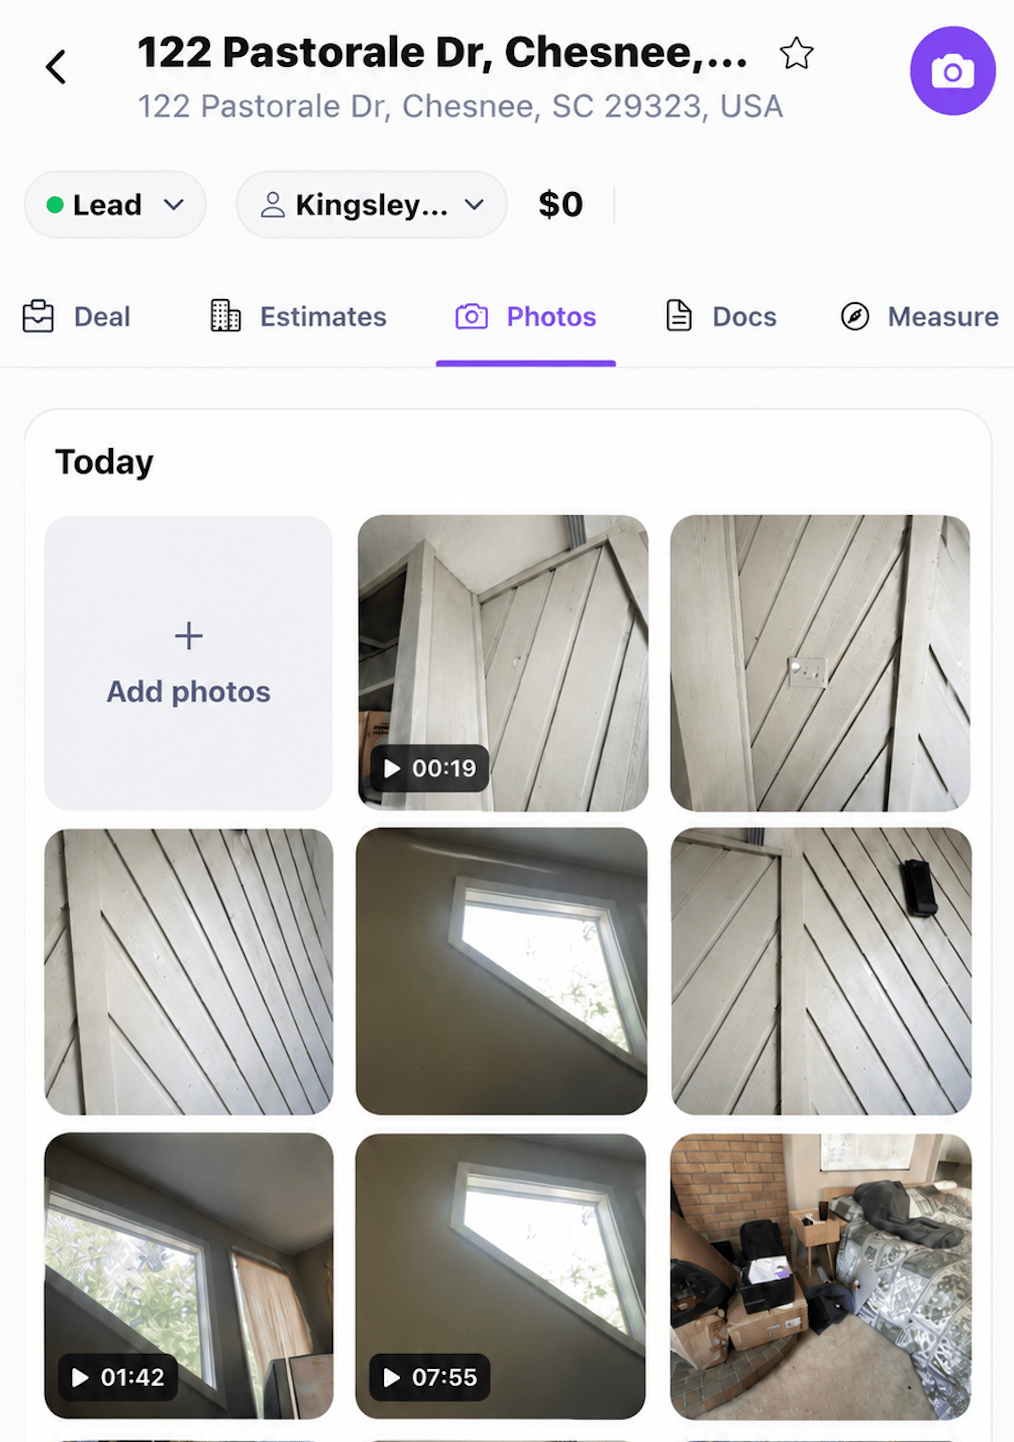
Videos appear inside the project’s **Photos** section alongside regular project photos.
A video thumbnail is identified by:
* A play icon
* A duration marker, such as `00:19` or `04:36`
* A preview frame from the recording
Videos remain organized by project and capture date, just like photos.
You do not need to open a separate media library to find them.
## Find videos from the main Photos area
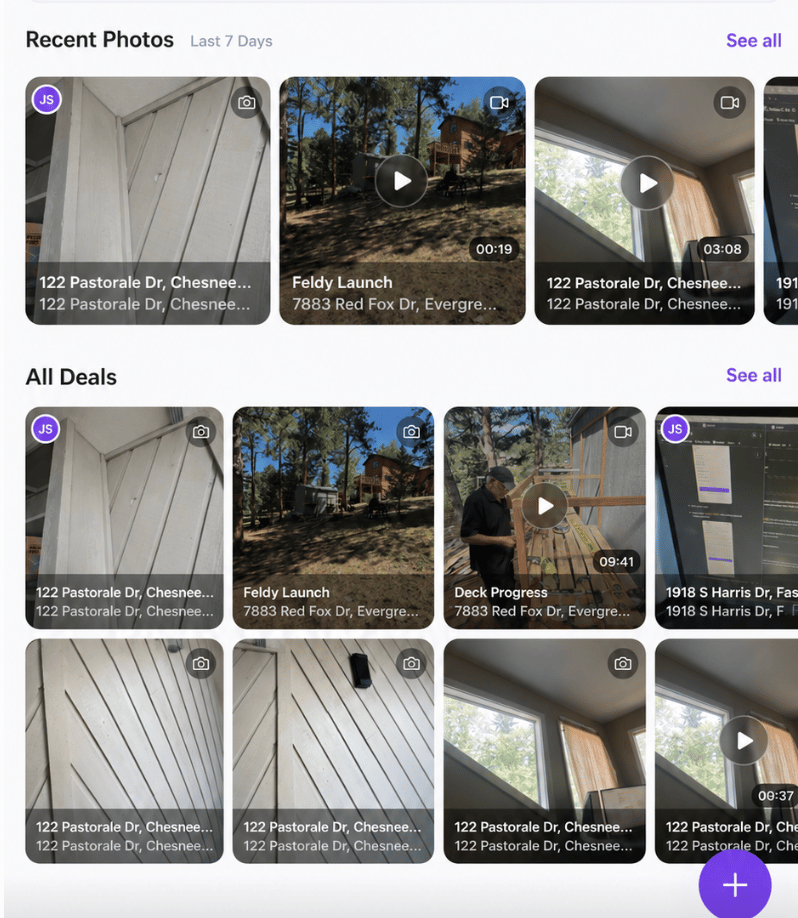
Videos can also appear in the app’s main **Photos** area.
Depending on the view, you can browse visual media by:
* Project
* Date
* User
* Label
Video thumbnails remain distinguishable from photos through the play icon and duration marker.
## Play a video
To watch a video:
1. Open the project’s **Photos** section.
2. Select a video thumbnail.
3. Use the playback controls to watch the recording.
The video remains connected to the project where it was captured.
## Delete a video
Delete a video when it was captured accidentally, is no longer needed, or documents the wrong project.
Before deleting, confirm that the video is not required for:
* Customer communication
* Inspection records
* Progress documentation
* Insurance documentation
* Quality control
* Dispute resolution
* Completion evidence
Deleting a video may permanently remove it from the project.
# Best use cases
Videos are most valuable when movement, sequence, scale, or surrounding context matters.
## Existing-condition documentation
Record the site before work begins.
Common examples include:
* Entire-room conditions
* Exterior elevations
* Roof surfaces
* Existing finishes
* Damage before demolition
* Furniture and personal property
* Access routes
* Landscaping
* Adjacent surfaces
* Existing workmanship
A video can establish broader context that may be difficult to communicate through isolated photos.
## Roofing and exteriors
Use video to document:
* Roof damage
* Multiple roof slopes
* Siding condition
* Window and door openings
* Gutters
* Fascia and soffits
* Flashing
* Decks
* Railings
* Exterior access
* Storm damage
* Trees or obstructions near the structure
Videos can help office teams understand how exterior areas connect and identify conditions that may affect estimating or installation.
## Interior remodeling
Record continuous views of:
* Kitchens
* Bathrooms
* Basements
* Living areas
* Hallways
* Existing layouts
* Cabinet configurations
* Built-ins
* Flooring transitions
* Ceiling conditions
* Room connections
* Areas scheduled for demolition
Video is useful when the relationship between multiple walls, openings, and rooms matters.
## Flooring
Flooring teams can use videos to document:
* Existing flooring materials
* Transitions between rooms
* Stairs
* Thresholds
* Damaged areas
* Furniture and access limitations
* Subfloor concerns
* Floor-level changes
* Hallways and connected spaces
* Demolition requirements
## Painting
Painting contractors can record:
* Wall and ceiling condition
* Peeling or cracking paint
* Water stains
* Existing colors
* Trim condition
* Accent walls
* High ceilings
* Stairwells
* Areas requiring protection
* Furniture and obstacles
* Surface-preparation requirements
## Windows and doors
Use video to document:
* Multiple openings
* Interior and exterior trim
* Frame condition
* Water intrusion
* Hardware
* Glass damage
* Access conditions
* Nearby finishes
* Opening locations within a room
* Customer concerns
## Restoration
Restoration teams can capture:
* Water migration
* Fire damage
* Smoke damage
* Mold-affected areas
* Damaged contents
* Demolition boundaries
* Flooring damage
* Wall and ceiling damage
* Multiple connected affected rooms
* Conditions before mitigation
* Conditions after mitigation
Video can provide valuable visual context for insurance, internal review, and reconstruction planning.
## Progress documentation
Record work at important milestones, such as:
* Before work begins
* After demolition
* After framing
* After rough-in
* Before surfaces are closed
* During installation
* After painting
* At substantial completion
* During final inspection
* After punch-list completion
## Quality control
Project managers and supervisors can use video to record:
* Installation quality
* Incomplete work
* Punch-list items
* Damage caused during construction
* Areas requiring correction
* Final workmanship
* Site cleanliness
* Safety issues
* Material condition
* Subcontractor progress
## Customer updates
Videos can help communicate progress to customers who are not on site.
Examples include:
* Weekly progress updates
* Milestone completion
* Newly discovered conditions
* Change-order context
* Material-placement questions
* Areas awaiting customer decisions
* Completed work
* Final walkthroughs
## Property management
Property managers can use video for:
* Move-in documentation
* Move-out documentation
* Unit turns
* Maintenance inspections
* Common-area inspections
* Damage records
* Vendor communication
* Capital-improvement planning
* Apartment condition reports
* Commercial property reviews
## Cleaning and property services
Videos can document:
* Pre-service condition
* Post-construction debris
* Move-out cleaning scope
* Heavy-soil areas
* Large or complex properties
* Areas requiring specialty cleaning
* Completed service
* Customer concerns
* Access restrictions
* Final quality checks
## Safety and access conditions
Record conditions that may affect project planning, including:
* Narrow access
* Steep stairs
* Low ceilings
* Overhead hazards
* Electrical hazards
* Unstable materials
* Pets
* Occupied spaces
* Limited parking
* Material-staging areas
* Ladder access
* Equipment restrictions
# Videos compared with AI Job Walkthroughs
Videos and AI Job Walkthroughs serve different purposes.
## Video
A video is a raw visual recording of the jobsite.
Use it when you primarily need to preserve:
* Visual context
* Movement through a space
* Existing conditions
* Installation progress
* Completion evidence
A standard video does not automatically create a structured document.
## AI Job Walkthrough
An AI Job Walkthrough captures field narration and visual context, then generates an organized project document.
Use it when you want Feldy to help structure:
* Work categories
* Scope notes
* Field observations
* Supporting photos
* Requested repairs
* Project documentation
Choose **Video** for raw visual evidence and **Walkthrough** when the desired output is an AI-generated document.
# Use videos in project workflows
Videos can support:
* Estimating
* Scope development
* Field reports
* Milestone updates
* Customer communication
* Quality-control reviews
* Inspection records
* Change orders
* Insurance documentation
* Internal project handoffs
* Installer preparation
* Completion documentation
Videos provide context, but they do not replace verified measurements, written scope, product specifications, or professional review.
# Best practices
Before recording:
* Confirm that the correct project is selected.
* Clean the camera lens.
* Check available device storage.
* Use a stable internet connection when possible.
* Decide whether the area should be one video or several shorter recordings.
While recording:
* Move slowly.
* Keep the camera steady.
* Avoid rapid turns.
* Hold briefly on important conditions.
* Move closer when detail matters.
* Capture the wider area before recording close-ups.
* Avoid covering the microphone.
* Keep each video focused on one area or purpose.
* Record another video when moving to a different location.
* Stay within the 10-minute limit.
After recording:
* Confirm that the video appears in the tray.
* Review the duration.
* Remove accidental recordings before finishing.
* Select **Record another** when more areas need documentation.
* Wait for uploads to complete.
* Confirm that the videos appear in the project’s **Photos** section.
> **Feature availability:** Video capture is currently available to selected organizations. Contact [**support@feldy.ai**](mailto:support@feldy.ai) to request access. Organizations without access may be added to the waitlist.
## Find videos in a project
Videos appear inside the project’s **Photos** section alongside regular project photos.
A video thumbnail is identified by:
* A play icon
* A duration marker, such as `00:19` or `04:36`
* A preview frame from the recording
Videos remain organized by project and capture date, just like photos.
You do not need to open a separate media library to find them.
## Find videos from the main Photos area
Videos can also appear in the app’s main **Photos** area.
Depending on the view, you can browse visual media by:
* Project
* Date
* User
* Label
Video thumbnails remain distinguishable from photos through the play icon and duration marker.
## Play a video
To watch a video:
1. Open the project’s **Photos** section.
2. Select a video thumbnail.
3. Use the playback controls to watch the recording.
The video remains connected to the project where it was captured.
## Delete a video
Delete a video when it was captured accidentally, is no longer needed, or documents the wrong project.
Before deleting, confirm that the video is not required for:
* Customer communication
* Inspection records
* Progress documentation
* Insurance documentation
* Quality control
* Dispute resolution
* Completion evidence
Deleting a video may permanently remove it from the project.
# Best use cases
Videos are most valuable when movement, sequence, scale, or surrounding context matters.
## Existing-condition documentation
Record the site before work begins.
Common examples include:
* Entire-room conditions
* Exterior elevations
* Roof surfaces
* Existing finishes
* Damage before demolition
* Furniture and personal property
* Access routes
* Landscaping
* Adjacent surfaces
* Existing workmanship
A video can establish broader context that may be difficult to communicate through isolated photos.
## Roofing and exteriors
Use video to document:
* Roof damage
* Multiple roof slopes
* Siding condition
* Window and door openings
* Gutters
* Fascia and soffits
* Flashing
* Decks
* Railings
* Exterior access
* Storm damage
* Trees or obstructions near the structure
Videos can help office teams understand how exterior areas connect and identify conditions that may affect estimating or installation.
## Interior remodeling
Record continuous views of:
* Kitchens
* Bathrooms
* Basements
* Living areas
* Hallways
* Existing layouts
* Cabinet configurations
* Built-ins
* Flooring transitions
* Ceiling conditions
* Room connections
* Areas scheduled for demolition
Video is useful when the relationship between multiple walls, openings, and rooms matters.
## Flooring
Flooring teams can use videos to document:
* Existing flooring materials
* Transitions between rooms
* Stairs
* Thresholds
* Damaged areas
* Furniture and access limitations
* Subfloor concerns
* Floor-level changes
* Hallways and connected spaces
* Demolition requirements
## Painting
Painting contractors can record:
* Wall and ceiling condition
* Peeling or cracking paint
* Water stains
* Existing colors
* Trim condition
* Accent walls
* High ceilings
* Stairwells
* Areas requiring protection
* Furniture and obstacles
* Surface-preparation requirements
## Windows and doors
Use video to document:
* Multiple openings
* Interior and exterior trim
* Frame condition
* Water intrusion
* Hardware
* Glass damage
* Access conditions
* Nearby finishes
* Opening locations within a room
* Customer concerns
## Restoration
Restoration teams can capture:
* Water migration
* Fire damage
* Smoke damage
* Mold-affected areas
* Damaged contents
* Demolition boundaries
* Flooring damage
* Wall and ceiling damage
* Multiple connected affected rooms
* Conditions before mitigation
* Conditions after mitigation
Video can provide valuable visual context for insurance, internal review, and reconstruction planning.
## Progress documentation
Record work at important milestones, such as:
* Before work begins
* After demolition
* After framing
* After rough-in
* Before surfaces are closed
* During installation
* After painting
* At substantial completion
* During final inspection
* After punch-list completion
## Quality control
Project managers and supervisors can use video to record:
* Installation quality
* Incomplete work
* Punch-list items
* Damage caused during construction
* Areas requiring correction
* Final workmanship
* Site cleanliness
* Safety issues
* Material condition
* Subcontractor progress
## Customer updates
Videos can help communicate progress to customers who are not on site.
Examples include:
* Weekly progress updates
* Milestone completion
* Newly discovered conditions
* Change-order context
* Material-placement questions
* Areas awaiting customer decisions
* Completed work
* Final walkthroughs
## Property management
Property managers can use video for:
* Move-in documentation
* Move-out documentation
* Unit turns
* Maintenance inspections
* Common-area inspections
* Damage records
* Vendor communication
* Capital-improvement planning
* Apartment condition reports
* Commercial property reviews
## Cleaning and property services
Videos can document:
* Pre-service condition
* Post-construction debris
* Move-out cleaning scope
* Heavy-soil areas
* Large or complex properties
* Areas requiring specialty cleaning
* Completed service
* Customer concerns
* Access restrictions
* Final quality checks
## Safety and access conditions
Record conditions that may affect project planning, including:
* Narrow access
* Steep stairs
* Low ceilings
* Overhead hazards
* Electrical hazards
* Unstable materials
* Pets
* Occupied spaces
* Limited parking
* Material-staging areas
* Ladder access
* Equipment restrictions
# Videos compared with AI Job Walkthroughs
Videos and AI Job Walkthroughs serve different purposes.
## Video
A video is a raw visual recording of the jobsite.
Use it when you primarily need to preserve:
* Visual context
* Movement through a space
* Existing conditions
* Installation progress
* Completion evidence
A standard video does not automatically create a structured document.
## AI Job Walkthrough
An AI Job Walkthrough captures field narration and visual context, then generates an organized project document.
Use it when you want Feldy to help structure:
* Work categories
* Scope notes
* Field observations
* Supporting photos
* Requested repairs
* Project documentation
Choose **Video** for raw visual evidence and **Walkthrough** when the desired output is an AI-generated document.
# Use videos in project workflows
Videos can support:
* Estimating
* Scope development
* Field reports
* Milestone updates
* Customer communication
* Quality-control reviews
* Inspection records
* Change orders
* Insurance documentation
* Internal project handoffs
* Installer preparation
* Completion documentation
Videos provide context, but they do not replace verified measurements, written scope, product specifications, or professional review.
# Best practices
Before recording:
* Confirm that the correct project is selected.
* Clean the camera lens.
* Check available device storage.
* Use a stable internet connection when possible.
* Decide whether the area should be one video or several shorter recordings.
While recording:
* Move slowly.
* Keep the camera steady.
* Avoid rapid turns.
* Hold briefly on important conditions.
* Move closer when detail matters.
* Capture the wider area before recording close-ups.
* Avoid covering the microphone.
* Keep each video focused on one area or purpose.
* Record another video when moving to a different location.
* Stay within the 10-minute limit.
After recording:
* Confirm that the video appears in the tray.
* Review the duration.
* Remove accidental recordings before finishing.
* Select **Record another** when more areas need documentation.
* Wait for uploads to complete.
* Confirm that the videos appear in the project’s **Photos** section.
> **Feature availability:** Video capture is currently available to selected organizations. Contact [**support@feldy.ai**](mailto:support@feldy.ai) to request access. Organizations without access may be added to the waitlist.